Tag:

Darcy Swain

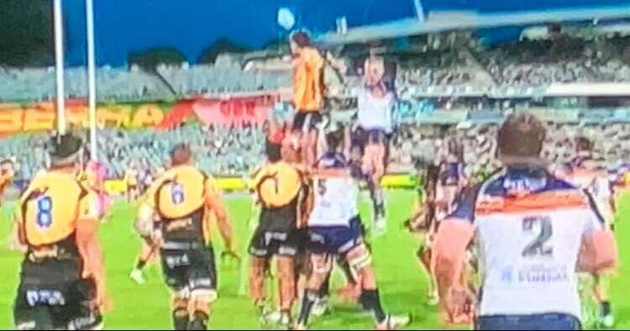
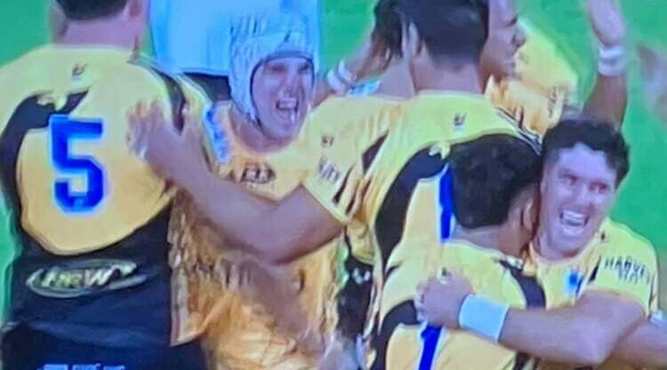
It was a game of competitive two-halves rugby that was held under wet weather between the Queensland Reds and Western Force tonight at Suncorp Stadium as we are nearly halfway (Week 7 of 16). Reds got themselves going before some ill-discipline and poor line-outs have marked a huge setback while Force played the Reds with Fire of the gold & black jersey so they can make every chance count that can keep their Top 6 Finals hopes alive. 

There can be only be one winner having levelled 21-21 at half-time and in the end, it’s the mighty Queensland Reds who took home yet another win like it was a few weeks ago in their last own match on the Force’s own ground at HBF Park, 28-24.

IMG 22542

From elsewhere 

Here’s what you need to know prior to this game tonight:

  • Gotta feel for the Waratahs especially Max Jorgensen who picked up an unfortunate injury during their big loss to the Hurricanes early last night to begin Week 7’s matches at Wellington’s Sky Stadium by 57-12.
  • ACT Brumbies broke the Highlanders’ hearts that late to sign off their strong home ground front at GIO Stadium also last night in Canberra, 34-27.
  • Crusaders got battered & bruised this weekend in Christchurch thanks to Moana Pasifika who are back in business with a long way to go (from last spot to now 9th), 29-45.
  • And there’s only four games out of five since the Chiefs and Blues (both last year’s grand finalists) are having the week-long off the field.

Top 3 players

Filipo Daugunu belongs to the heart of Ballymore having made up some magic attacking metres while he was superb at locking up in defense – no wonder his goalkeeping & striking background from soccer helped him struck a good balance right at the middle of the Reds’ outside 13.

So does fellow Red Tate McDermott as the reverse 9 where his supercharged influences created shockwaves at the Force’s own doormat, especially in the last 10 mins thanks to his late TRY & that enough to get over the line in the end.

IMG 22532 2

All in all, yes, there were some mistakes like poor line-outs and ill-discipline but hey, Queenslanders never back down!

And you can’t go past the Western Force’s own running rugby with Darcy Swain’s top-class input all on the second row 5 from line-out intercepts to building pressure both attack and defence which proved to be a huge difference so far. 

Yes, unlucky there from Force who had the better ball than the Reds – they just struggled have the last say in the end.

0 comment
0 FacebookTwitterPinterestEmail

Week 2 of 16 in the 2025 Super Rugby Season capped off with another Western Force win this time away from home against the regular semi finalists ACT Brumbies team in Canberra’s GIO Stadium. Force fired off with a string of early tries despite their rash decisions going into half-time by 14-28 while Brumbies found themselves back on track at last to play catch-up as it goes on.

Even though the Force were in trouble again discipline wise with 14 or even 13 men with 15 minutes to go, it’s not doom and gloom though where Force regained the lead whenever they had the ball – and that allowed them to finish off in style by a mere three point difference, it’s 42-45.

Elsewhere, the Crusaders were harshly beaten last night by the runner-up Chiefs and so does the current champs Blues at the hands of Highlanders in Dunedin earlier this evening. But the best part about this weekend is that Australian Rugby is still on a roll so far in 2025 thanks to an all-Aussie top-seed Brumbies upset by the Force followed by a statement Queensland Reds win v Moana Pasifika also from last night in Brisbane.

IMG 716011

Top 3 players report card

As said, congrats to the Western Force with their close win once again – they’ve got a fantastic group of players along with Kiwi Head Coach Simon Cron who knows how to give back with their own swagger of Running Rugby.

Guys like Darcy Swain on the second row at 5 do mean business having taken a huge leap of faith from Canberra to Perth and yet he did not disappoint at all in the way he breaks down thanks to the Force’s unreal start to the game while they continued to add more points as it goes despite their ill-discipline & yellow cards.

IMG 713211

The same goes to Dylan Pietch on the left wing despite picking up a yellow at one stage earlier on but his work rate though shouldn’t be underestimated thanks to his undeniable pace that got the best out of Dylan both in attack & defense and it’s clear he wants more of this often as long as the Magic comes to him – you never know & he will fill you in with surprises.

And Charlie Cale never backs down with his No.8 Brumbies shirt on his sleeve such as his two-TRY haul in between two halves who unpacks excellent physical grit through his head planted down low. It’s just a shame their poor starts and decision making forced the Force’s hand as one big mistake under pressure can turn out costly & that was the name of the game tonight.

0 comment
0 FacebookTwitterPinterestEmail

By Daniel Cullinane

Twitter: @dcullinane02

It was a feisty build-up to this second test between New Zealand and Australia at Eden Park. All the talk had been about the controversial decision for time-wasting that ended the Wallabies chances of winning the Bledisloe cup in the first test. The reckless action of lock Darcy Swain, and the claims that the Wallabies had disrespected the haka. The potential for a heated contest was high.

Australia got the game under way and quickly put pressure on New Zealand with a break by Jed Holloway, who charged into the All Blacks 22. He quickly undid his good work by dumping Dalton Papali’i at the ruck. He was yellow-carded, and so began the rollercoaster of indiscipline that appears to be blighting the Australian game.

New Zealand on the other hand, were lifting their game and showing early dominance. A strong scrum saw All Black number 8 Ardie Savea break. The ball went wide to Beauden Barrett, who turned on the after burners and then chipped, to pile the pressure on the Wallabies. The All Blacks were awarded a 5 metre scrum but Savea was unable to control the ball at the base. Australia cleared their lines.

Then a moment of magic from Wallaby wing, Marika Koroibete. A break down the midfield followed by a chip, catch, and grubber to put huge pressure on the New Zealanders in their own 22. Again, the Wallabies infringed, leading to a kickable penalty for Richie Mo’unga. 3-0 to the All Blacks. Wing; Will Jordan soon built on the score with a fine break and subsequent try. Mo’unga made it 10-0.

Australia was creaking badly and the pressure was clearly affecting their thinking. Tom Wright confirmed this by taking a quick tap penalty from an eminently kickable position and an almost guaranteed 3 points. Another penalty by Wallaby skipper James Slipper led to a New Zealand lineout in the Aussie 22. Afterwards, a powerful maul forced a penalty try and yet another yellow card for Australia. David Porecki left the field for 10 minutes. Half time arrived and the score was 17-0; New Zealand were flying.

In the second half, the All Blacks carried on where they had left off. Within 2 minutes, they scored through captain Sam Whitelock. Mo’unga converted to make the score 24-0. The All Blacks had by now recognised that the Wallabies couldn’t live with them in the set piece. Again, they went to the lineout. Again they formed a driving maul and powered over the Aussie line. This time it was Codie Taylor on the scoresheet. The conversion was missed. 32-0 to the All Blacks.

At last the Australians fired a shot when Nick Frost charged down a New Zealand kick in their 22. Pete Samu collected the ball and surged forwards. Support came from replacement hooker Folau Fainga’a, who charged over the line. Bernard Foley kicked the conversion; Points on the boards. 32-7.

The All Blacks responded almost immediately with another pushover try from the lineout. Samisoni Taukei’aho the scorer.

In the 76th minute, Richie Mo’unga had another shot at goal to make it 40-7. The Aussies would have the final word in a very one-sided game when a determined Jordan Petaia forced his way over. The try was converted. The final score 40-14 to New Zealand. It was a dominant display from the men in black. Probably their best performance in the tournament.

The All Blacks were sharp, their set piece was outstanding, and they were clinical when they needed to be. Australia has some big issues to deal with. Their discipline has been woeful since their test series defeat to England back in July. They have spent large parts of the Rugby Championship playing with less than fifteen men on the field. Going forward, the lack of leadership is clearly a problem they must address if they are to be successful.

0 comment
0 FacebookTwitterPinterestEmail

By Daniel Cullinane

Twitter: @dcullinane02

Even after the defeat by the Springboks in the last round of the Rugby Championship, the Wallabies would go into this match with quiet confidence. With home advantage against an All Blacks team who have looked shaky in this competition and beyond, they would have felt that they could get on top of their old rivals.

New Zealand would be in a better place after a resounding win against the Pumas, but there is still a sense that they are unsure of themselves. The Wallabies would seek to test the All Blacks alleged fragile state. The Wallabies set the tone for the game by advancing on the All Blacks during the Haka, signalling that they were really up for this one. However, as the game got under way it was the New Zealanders who took the initiative.

IMG 8459 1 1

After just 3 minutes, All Blacks hooker Samisoni Taukei’aho powered over the Wallabies try line to open the scoring. Following a successful conversion from fly half Richie Mo’unga the score was 0-7. The men in blacks dominance continued and was rewarded with another 3 points from the boot of Mo’unga. They were building nicely. The Wallabies were yet to turn up.

IMG 8523 1 1

After 17 minutes, some good work by the Australians from a lineout lead to a kickable penalty. Veteran Aussie fly half, Bernard Foley who was exemplary all evening opened his account with three points. Some slick handling saw Wallaby full back Andrew Kellaway score in the corner. But on closer inspection it was clear that he had been unable to ground the ball.

IMG 8465 1 1

The Australian team were growing in confidence and starting to impose themselves on the All Blacks. They kicked to the corner after being awarded a penalty at the scrum. There was a short drive from the ensuing lineout and then a pick and go to score by Aussie No8 Rob Valetini. Foley made it 10-10.

IMG 8471 1

With an All Black going to the bin, the momentum was firmly with the Australians. Marika Koroibete charged up the field and smashed into New Zealand wing Caleb Clarke. The Wallaby forwards then dismantled the All Blacks at the resulting scrum. Although the scoreboard didn’t reflect it, Australia were on top. But then, everything changed. The Aussies hit self destruct. A superb and powerful break by Clarke ended with a pile-up near the Australian try line. Indiscipline meant that Tom Wright and Darcy Swain were sent to the bin. The tables turned almost instantly, with the All Blacks being held up over the line. Half time came, the score 10 all.

IMG 8476 1 1

The men in Black had clearly been told to take advantage of the 13-man Australia, and did so in spectacular fashion. A testing kick in behind and then some rapid passing saw Samisoni Taukei’aho score his second try of the match. Soon the Wallabies were back to a full compliment and picked up another kickable penalty. Foley rarely misses, making the score 13-17.

IMG 8484 1 1

More indiscipline led to Wallaby scrum half Jake Gordon going to the bin. New Zealand soon took advantage with Richie Mo’unga dissecting the Aussie backline to touch down near the posts. He converted his own try, making the score 13-24 to New Zealand.

IMG 8486 1 1

Beauden Barrett then reminded everyone what a world-class player he is with a superbly weighted chip over the gold defence that was collected by wing Will Jordan, who raced away to score. The All Blacks were in cruise control. Australia then fired a shot of their own down the other end with Andrew Kellaway running on to a flat pass from Foley to grab a much needed score. Foley converted. Minutes later, Kellaway was at it again. Some long passes stretch the New Zealand defence allowing the full-back to score in the corner. 27-31 to Australia.

IMG 8498 1

New Zealand then extended their lead through a Mo’unga penalty, but Australia weren’t finished yet. A brilliant one-two between Koroibete and Pete Samu saw the back row forward score. Foley then drew the teams level at 34 all. A remarkable comeback by Australia.

IMG 8495 1

When Australia were awarded a penalty in front of the posts, the replacement scrum-half Nic White stepped up and kicked the points for Australia to take them into the lead. As expected, the All Blacks fought back but then gave away a penalty 2 metres from the Aussie try line. Then a moment of controversy saw referee Mathieu Raynal award a scrum to New Zealand for Bernhard Foley allegedly time wasting.

IMG 8506 1 1 e1663277296518

The All Blacks saw their chance. They won the ball, and then moved it wide, allowing Jordie Barrett to score in the corner in the 80th minute. The kick was missed, but it didn’t matter. The men in black had done enough to win the match and retain the Bledisloe cup. Australia will say they were on the wrong end of a refereeing decision, and that cost them the game. Their discipline needs to be fixed before the return fixture. Final score 37-39. Great game.

IMG 8513 1 1
0 comment
0 FacebookTwitterPinterestEmail

The Blues have a real hero in star man Beauden Barrett at first-five eighth after his heroics last night. He brings a lot of creative and attacking ideas that helped get the ball rolling for his Blues team. The patience is there when the Blues bide themselves some time, especially when going up against a robust Brumbies defense. It helped his Blues side win penalties, as well as a couple of successful tries before he finished off the game perfectly with a drop goal kick by himself. He hopes to leave a legacy for Auckland by gifting them one or two Super Rugby trophies, while helping his side dominate this decade in place of the Crusaders.

The next standout Blues player is rugby league-turned-union convert Roger Tuivasa-Sheck at inside centre. He loves being part of the attack by smashing his way through the Brumbies defensive line, as well as shielding the opposition half that helped the Blues gave a couple of clues on where to plant that TRY line. His physicality and pace also helped him flex his defensive contribution, especially when he successfully chased down Nic White at one point. He’s loving the XVs so far straight away after a decorated career in the NRL, as he hopes to nail down a Super Rugby title soon before putting his hat for All Blacks selection.

And Darcy Swain proved to be a menace to the Blues last night on the second row, having frustrated them a couple of times.
Yes, he would be disappointed with the yellow card over a rash tackle where the Brumbies dearly missed him that saw the Blues snatch a late lead ahead of half-time. But he never puts a foot wrong when it comes to his contribution on the pitch, thanks to his tall reach & mobility. He always ensured that the his Brumbies stopped the Blues from coming in its tracks defensively; He also formed a brilliant response going forward with the pace & physicality where the home side stayed well in this fight. Unfortunately, he dearly missed his backline where they weren’t firing like the Blues did, which was the one huge area that came to bite back the Brumbies.

0 comment
0 FacebookTwitterPinterestEmail

Darcy Swain is outstanding on debut at the second row where he kept a robust French attack quiet, especially in the dying seconds that helped the Wallabies kick out for the win.

He already has the Brumbies mentality applied last night that was taught from Super Rugby, which it’s crucial to step up & handle against International opposition.

And Darcy used his tall reach with his vision/physicality that highlighted France’s weaknesses before he took it with both hands with some attacking help along the way. Well done with many more to come if he plays again next month v All Blacks.

Then we move onto fellow Brumbies team-mate Noah Lolesio who is sensational at first five-eighth.

The kicking accuracy is there as usual even from difficult distances that ultimately secured last night’s Game 3 & series tour win (2-1) for the Wallabies.

Noah also shown much physicality thanks to his creative vision that was too hard to chase him down. Not only he was patient when he had the ball in hand, but spotted their lack of communication via the passage of play before he intercepted in return with the 1st half big score.

So really good representation from both Brumbies stars who can become key players at both provincial & International level in the next couple of years.

Cameron Woki is not an easy opponent to run into at the openside back row for France, where he’s solid as a rock in defense that earned them winning penalties.

He handled the maul well going forward during the first half, so great setup towards an early lead via the TRY thanks to half-back Baptiste Couilloud.

But the one thing that stopped the French from winning is the impatient attacking shape, and it’s something they lack on occasions that ultimately saw the Wallabies steal in return.

#AUSvFRA #InternationalRugby #Rugby #RugbyUnion #Wallabies #France

0 comment
0 FacebookTwitterPinterestEmail