Tag:

Recipe

Photo by Karolina Kołodziejczak on Unsplash

Lasagne – it’s one of those dishes that so many of us absolutely adore. However, it’s also a pretty allergen-laden recipe generally, with numerous ingredients that could potentially flare up allergies. Don’t fret, though; if you’ve been craving a rich, hearty, and oozy lasagne but can’t because of dairy and allergens, today’s dairy and allergen-free recipe might just give you an exciting new option.

How to Make a Dairy and Allergen-Free Lasagne

Lasagne might be delicious, but it contains several ingredients that are also common allergens – namely, dairy and gluten being the two most common types of allergens found in lasagne. Fortunately, the following recipe is tweaked to remove dairy, wheat, and gluten, so it may be a safer bet. 

Allergy Disclaimer

As a disclaimer, before we start: if you suffer from other allergies, feel free to switch out the ingredients to avoid your own allergies. For example, this recipe does include tomatoes and tomato puree, but if you have a tomato allergy, you could switch this out for herbs, spices, and a different chopped vegetable to make up for the lack of tomato flavour. Moreover, you should always check the ingredients you use very carefully to ensure they don’t contain or have the risk of contamination from any allergens you may be intolerant to.

Ingredients

– Plenty of gluten-free and allergen-free lasagne sheets*

– 1kg minced beef (this could be substituted for other types of mince or a mince alternative)

– Herbs and spices, to taste

– A splash of Worcester sauce or Barbecue sauce, to taste

– 30g brown sugar

– 400g of chopped tomatoes 

– 50g tomato puree or paste

– 75g margarine (or any suitable allergen-free butter alternative)

– 50g of gluten-free or allergen-free flour (as appropriate)

– 225g of allergen-free cheese alternative (as appropriate)

– 600ml coconut milk (or any suitable allergen-free alternative)

As an alternative, if you can’t find gluten-free lasagne sheets, you can potentially experiment with allergen-free wraps, although they won’t give quite the same texture in the end.
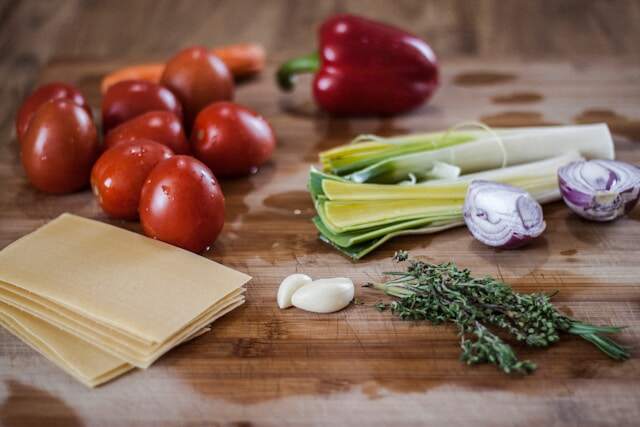
Photo by Kristine Tumanyan on Unsplash

Recipe

Making an allergen-free lasagne really isn’t so dissimilar to any regular lasagne recipe – it just requires slightly more creativity with ingredients!

Cooking the Bolognese 

Depending on your allergens, the exact ingredients you choose to include in your bolognese may vary. Onions, garlic, and oregano are classic choices, but you could choose any herbs and spices you like that don’t trigger allergies – or even just leave it as a simple, herb-free bolognese if you’re catering to multiple people.

1. Brown the minced beef over a medium heat until thoroughly cooked, taking care not to let it burn or catch.

2. Add the brown sugar, tomato puree, and chopped tomatoes to the minced beef, stirring continually over a gentle heat.

3. Add herbs, spices, and Worcester sauce to taste, then allow the bolognese to simmer to reduce in consistency and create a rich, hearty filling. Feel free to taste the bolognese and add additional herbs and spices as it cooks.

Making the White Sauce

1. Melt your butter alternative or margarine over a gentle heat and add in the flour gradually to form a smooth paste. 

2. Slowly add your milk alternative, stirring thoroughly with each addition to ensure the sauce incorporates all of the milk and doesn’t split. Whisking may help if you find you still have lumps at the end.

3. Add any extra ingredients – such as herbs or mustard – to taste before allowing the sauce to simmer and thicken.

N.b. If you’d prefer to skip this step, you could always buy a can of allergy-free white sauce from the store instead!

Preparing the Lasagne

1. Preheat the oven to 190 degrees Celsius or 375 degrees Fahrenheit.

2. Grease or line a deep oven-proof baking dish. The deeper your dish, the deeper the lasagne will be. Avoid using a thin dish, as this will likely cause the lasagne to dry out too much.

3. Prepare your lasagne sheets (or, if you’re using wraps, cut these to size). If you are using dried allergen-free lasagne sheets, you may want to cook them first, although this isn’t strictly necessary.

4. Add a layer of bolognese sauce to the base of your dish, then place a layer of lasagne or wrap on top. Add a thick layer of white sauce to the lasagne sheet, then add more bolognese on top. Repeat as many times as necessary to create the desired depth for your lasagne dish.

5. Add the final layer of lasagne or wrap, then smother with a thin layer of white sauce and sprinkle with your choice of cheese alternative. You could also add more herbs and spices to the top of the dish at this stage, if desired.

6. Bake until cooked all the way through and bubbling. Allow to stand before serving, as it will be very hot! 
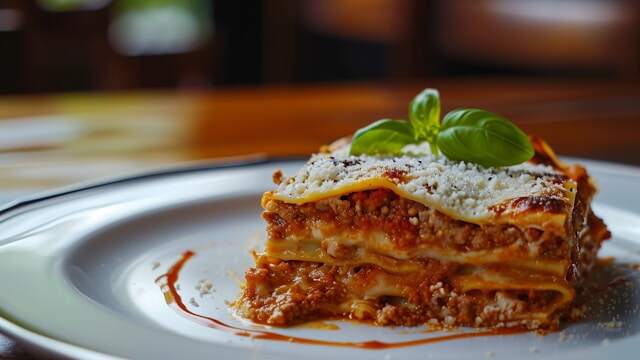
Photo by Emanuel Ekström on Unsplash

Final Thoughts

Making a traditional lasagne without dairy or some of the most common allergens definitely requires a little creativity. However, it’s certainly not impossible, and today’s hearty recipe should still hit the spot – but, of course, always double check every ingredient you put in before cooking to make sure it doesn’t contain any allergens you may have. Yum!

0 comment
0 FacebookTwitterPinterestEmail

Image by Sharon Ang from Pixabay

Truly, breading chicken with breadcrumbs is an art in itself that opens up the door to so many more possibilities than one could imagine for diets. It opens the door to veganism, being allergic to eggs, dairy, or just wanting an improved way of breading for health reasons. In this guide, we are going to learn some of the diverse ways and techniques in which one can bread their chicken to be crispy and tasty, all while remaining totally plant-based and allergy-friendly.

Break Down the Ingredients:

Before we go into the recipes, let’s know the ingredients we’ll be using : 

● Chicken Alternatives: Choose plant-based chicken alternatives like seitan, tofu, or tempeh for a completely vegan recipe.

● Breadcrumbs: Just check the ingredient list of the store-bought or homemade variety to ensure they are egg and dairy-free.

● Binders: Eggs are substituted with a number of alternatives such as aquafaba (brine from chickpeas), flaxseed meal, or cornstarch mixed with water.

● Spices: Play around with the spices you could add, such as garlic powder,  powdered chives,  ground bell peppers, dried oregano, nutritional yeast. 

● Cooking Oil: Use high heat oil, like canola, vegetable, or peanut, for frying or baking.

Aquafaba Magic

Breading: Canned chickpeas make a great egg replacer and work really well in breading. Here’s how: 

● Drain a can of chickpeas and collect the aquafaba in a bowl.

● Soak the meat substitute in aquafaba, ensuring they are well coated.

● Pop the chicken into the bowl with seasoned breadcrumbs and toss.

● Repeat the previous steps to obtain the right thickness of.

● Deep fry or bake the coated chicken until golden brown.

Flax Power

Flaxseeds are very nutritious and serve as a good binder in breading recipes. To use flax as an egg replacer in breading mixtures: 

● Mix together ground flaxseed meal and water in the ratio of 1 tablespoon of flaxseed meal to 3 tablespoons of water for each egg being replaced.

● Leave for a few minutes until the mixture achieves gel-like consistency.

● Dip the chicken alternative into the flaxseed mix and coat well.

● Bread the chicken in seasoned crumbs.

● Fry, or bake to a delicate brown.

Cornflour Coating:

Cornstarch is another perfect egg substitute in that it adds to the crispy crust. Here is how to use it in your breadingprocedure. 

● Mix cornstarch and water to make a slurry.

● Dredge the chicken sub through the cornstarch slurry, dredging it.

● Move the chicken to the bowl with the breadcrumbs and coat thoroughly.

● Cook again if extra crispy is desired.

● Deep fry or oven-bake until the outside breading is golden brown and the chicken substitute is cooked.

Image by b13923790 from Pixabay

Type of Baking

For the healthier alternative to frying, bake your breaded chicken. Here’s how you do it. 

● Preheat your oven to 375°F (190°C) and line a baking sheet with parchment paper.

● Bread the chicken substitute with aquafaba, flaxseed, or cornstarch.

● Transfer the chicken to the prepared baking sheet.

● Spritz or paint it with some cooking oil to help get it to brown.

● Bake for 25-30 minutes and turn the pieces halfway through to ensure a uniformly crispy breading and full internal cooking.

0 comment
0 FacebookTwitterPinterestEmail

I wanted to make a homemade version of McDonald’s apple pie and it ended up tasting better than their pies. Here is the recipe for a serving of four.

As always, you can either use the ready-made pastry from the supermarkets if you’re not allergic to dairy or else look at my Avocado Oil pastry recipe here that is dairy-free. If you want to know how the homemade pastry is done, all you have to do is mix 1/3 cup of avocado oil, 2 cups of flour, some sprinkles of salt and sugar and mix it up together to make sure it doesn’t end up being dry & crumbly (you don’t want a collapsible pastry in there) by adding a few teaspoons at a time with rice milk or water – make sure you rest that homemade pastry dough once it’s done for at least an hour in the refrigerator.

While you’re waiting, it’s time to make the sauce of your homemade Apple Pie recipe that goes inside the foldable avocado oil pastry crust. I first peeled off the skin of a whole apple (doesn’t matter which size) before chopping them into small squares & put it onto a small saucepan filled with water where you will boil them in a low-medium heat for 8-10 minutes. Once the apples are soft after some time, put them onto a small bowl with a skimmer utensil while draining the boiled water from the saucepan away in a kitchen sink. Then mix some 1-2 teaspoons of corn starch & some lemon in a saucepan until there’s no lumps on the corn starch before heating it up again (low-medium setting) for another 2-3 minutes. After that, add the boiled apples onto the saucepan again and mix it up together with the sauce by turning off the heat where you now got your Apple Pie filling ready to go.

Now that the apple pie filling is ready alongside the rested pastry after an hour, roll the pastry dough to a decent thin size on your work bench before you add the apple filling in and fold the pastry dough by sealing it nice and tight where you will be placing it on a sausage roll maker machine for 30 minutes by flipping it over at the halfway cooking process. Once the pastry is nice and golden, cool these apple pies down for another 10 minutes so you don’t get a burnt tongue and they’re all ready to eat – how good!!

See it for yourself when you can go make your own McDonald’s style apple pie recipe that is dairy-free & delicious to eat at home.

0 comment
0 FacebookTwitterPinterestEmail